This is the next part of the series on developing and deploying
- Angular, ASP.NET Core Web API and SQL Server to Azure Kubernetes Service
- Function Apps using Azure Functions 2.0 runtime
In this article, I am going to share steps needed to deploy SonarQube to Azure Kubernetes Service cluster and integrate with Azure DevOps pipeline to setup code analysis for Angular and ASP.NET Core web apps created in previous parts of this series. The previous articles of this series are
Azure Kubernetes Service (AKS) – Deploying Angular, ASP.NET Core and SQL Server on Linux
Azure Functions 2.0: Create, debug and deploy to Azure Kubernetes Service (AKS)
The tools used to develop these components are Visual Studio for Mac/VS Code/VS 2017, AKS Dashboard, Docker for Desktop and kubectl.
SonarQube
SonarQube provides the capability to not only show health of an application but also to highlight issues newly introduced. I am going to configure SQL Server as backend database for SonarQube.
Create a SQL Server Database
Create a SQL Server database named ‘SonarDB’ in the existing SQL server instance I had created during the first part of this series. SonarQube requires that database collation must be case-sensitive and accent-sensitive. Either you can specify collation while creating database or update it e.g code snippets to create/change collation to SQL_Latin1_General_CP1_CS_AS are
CREATE DATABASE SonarDB

COLLATE SQL_Latin1_General_CP1_CS_AS;
ALTER DATABASE SonarDB

COLLATE SQL_Latin1_General_CP1_CS_AS;
Create a SQL Login account which SonarQube needs to connect to ‘SonarDB’ database.
Create a Persistent Volume
Persistent volume claim is needed to store SonarQube data. The yaml snippet to create a 5 GB storage is displayed below. The deployment resource is going to mount files to this storage claim. You can read more about Persistent Volumes.
 apiVersion: v1

kind: PersistentVolumeClaim

metadata:

  name: sonar-data-claim

spec:

  accessModes:

  - ReadWriteOnce

  resources:

   requests:

    storage: 5Gi
Create a Kubernetes Service
The next step is to create a Kubernetes Service for SonarQube. As you can see in yaml snippet below, port 80/9000 is defined and type is LoadBalancer i.e. this service will have external endpoints. Kubernetes will use to selector ‘app: sonar-deployment‘ to map to the deployment as you are going to see next. You can read more about Services.
 apiVersion: v1

kind: Service

metadata:

  name: sonar-svc

  labels:

    name: sonar-svc

spec:

  type: LoadBalancer

  ports:

  - protocol: TCP

    port: 80

    targetPort: 9000

  selector:

    app: sonar-deployment
Create a Kubernetes Deployment
The next step is to create a Kubernetes Deployment for SonarQube. The yaml snippet is displayed below and a few pointers are
- The docker image being used to create this resource is
image: sonarqube - You can change the number of pods by updating
replicas: 1 - Label
app: sonar-deploymenthas to match the selector defined in the service - Persistent volume claim created above is used for storage i.e.
persistentVolumeClaim: claimName:sonar-data-claim. - JDBC username, password and URL are specified which need to be updated based on values specific to your ‘SonarDB’ database and login user.
 apiVersion: extensions/v1beta1

kind: Deployment

metadata:

  name: sonar-deployment

  labels:

    app: sonar-deployment

spec:

  replicas: 1

  template:

    metadata:

      labels:

        app: sonar-deployment

    spec:

      terminationGracePeriodSeconds: 15

      initContainers:

      - name: fix-the-volume-permission

        image: busybox

        command:

        - sh

        - -c

        - chown -R 1000:1000 /opt/sonarqube/extensions

        securityContext:

          privileged: true

        volumeMounts:

        - name: sonarqube-data

          mountPath: /opt/sonarqube/extensions

      - name: fix-the-volume-permission1

        image: busybox

        command:

        - sh

        - -c

        - chown -R 1000:1000 /opt/sonarqube/data

        securityContext:

          privileged: true

        volumeMounts:

        - name: sonarqube-data

          mountPath: /opt/sonarqube/data

      containers:

      - name: sonarqube

        image: sonarqube

        ports:

        - name: sonarqube

          containerPort: 9000

        env:

        - name: SONARQUBE_JDBC_USERNAME

          value: sonar

        - name: SONARQUBE_JDBC_PASSWORD

          value: SONAR_SQL_LOGIN_PASSWORD

        - name: SONARQUBE_JDBC_URL

          value: jdbc:sqlserver://mssql-deployment:1433;databaseName=sonardb;user=sonar;password=SONAR_SQL_LOGIN_PASSWORD

        volumeMounts:

         - name: sonarqube-data

           mountPath: /opt/sonarqube/extensions

           subPath: extensions

         - name: sonarqube-data

           mountPath: /opt/sonarqube/data

           subPath: data

      volumes:

      - name: sonarqube-data

        persistentVolumeClaim:

           claimName: sonar-data-claim
After SonarQube resources are deployed to AKS cluster, navigate to the public endpoint and login using default credentials i.e. username and password is ‘admin’. You can change the password. For this sample built in users are provisioned for authentication however you can configure external identity providers. You can read more about external identity providers and http headers based authentication.
Enable SonarQube plugin in Azure DevOps
You need to enable SonarQube extension in Azure DevOps. Browse for SonarQube extension in marketplace and enable it.
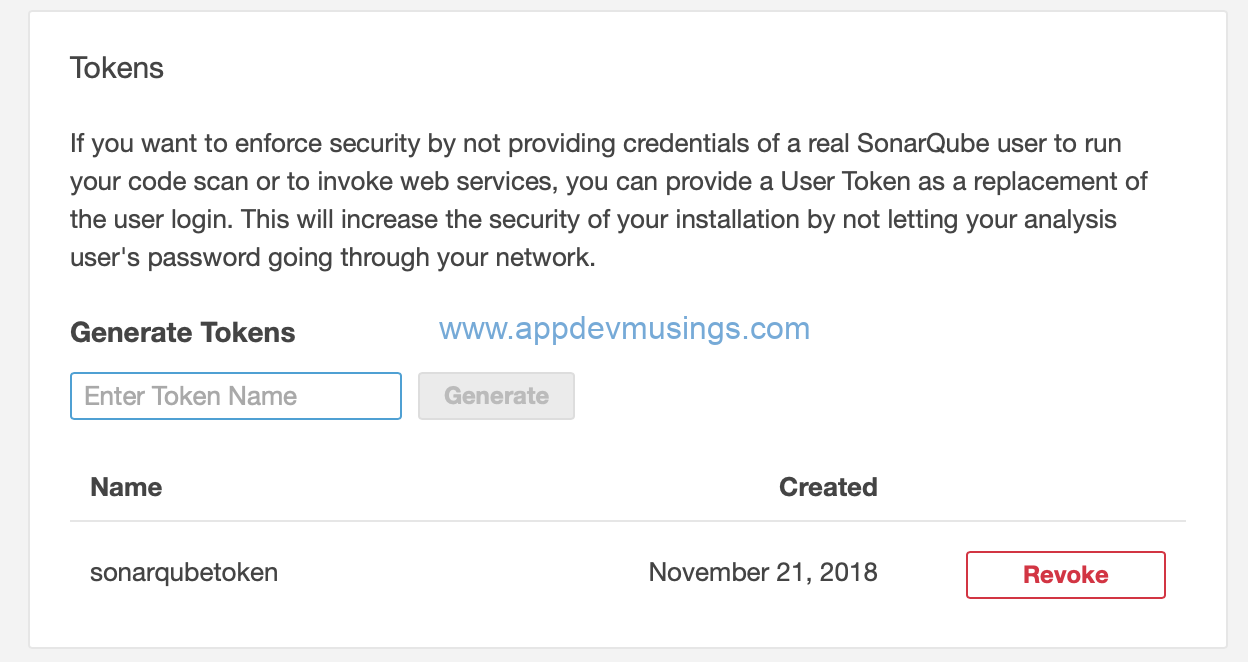
Generate Token in SonarQube
Azure DevOps will need token to connect to SonarQube instance. You need to generate token in SonarQube portal by navigating to SonarQube > Security > Generate Tokens. Keep a note of the token.
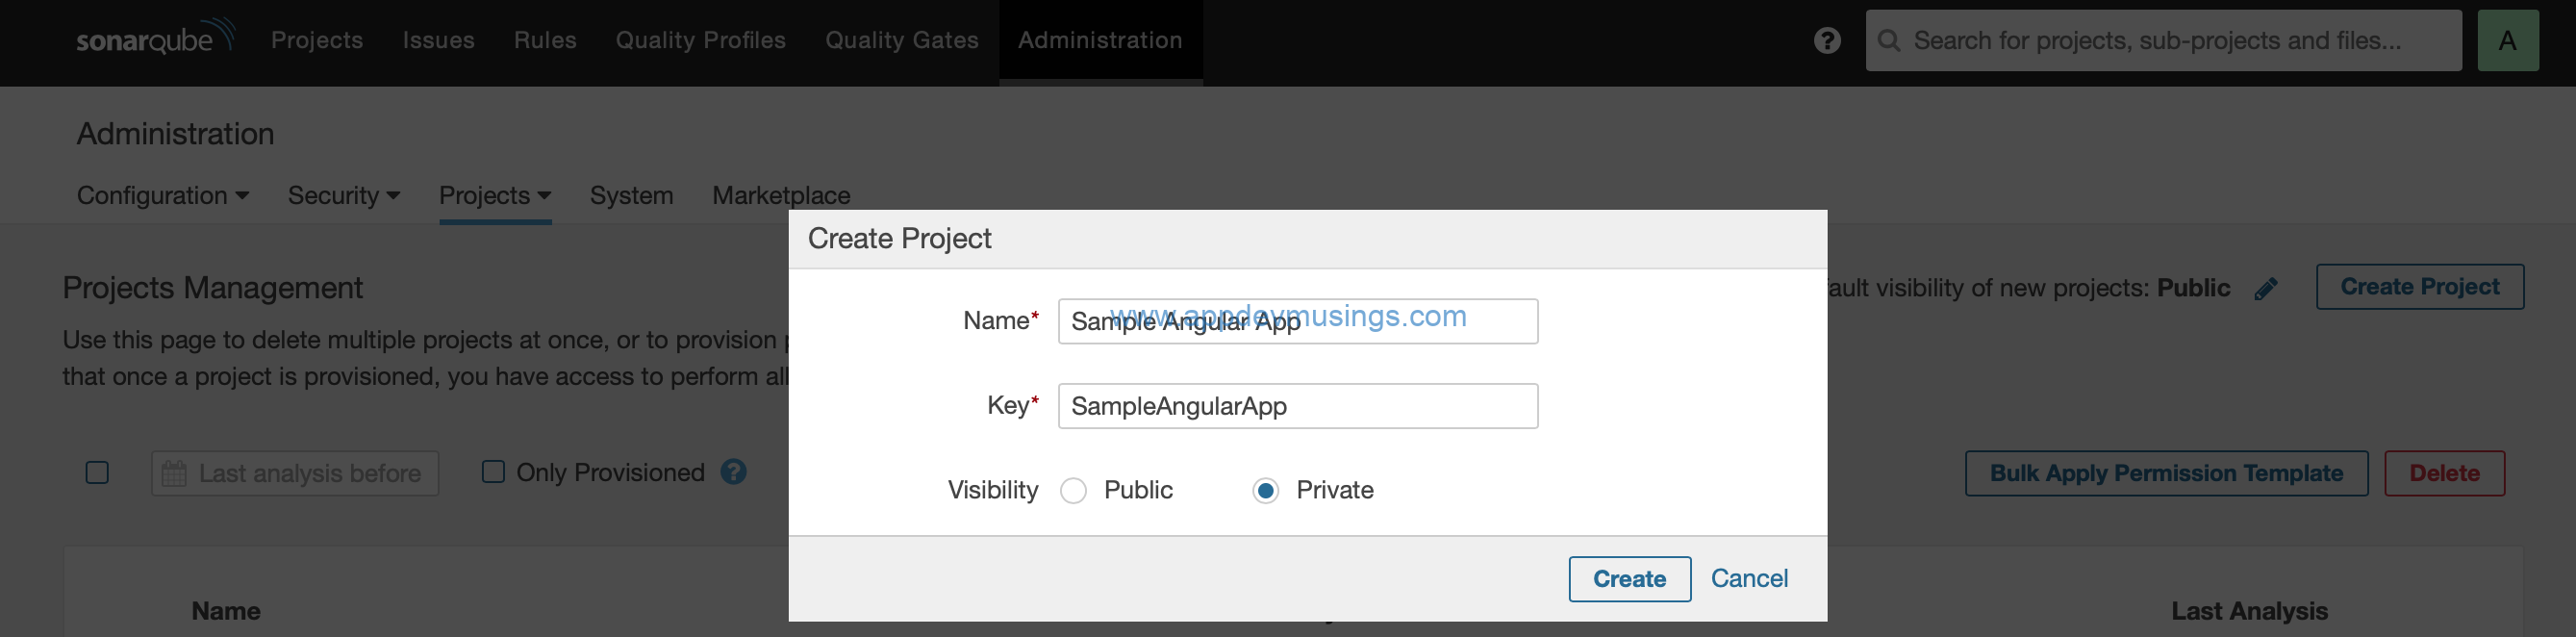
Create Projects in SonarQube
The next step is to create projects for Angular App and ASP.NET Core Web API in SonarQube portal. The project keys will be needed in Azure DevOps build pipeline thus keep a note of these values.
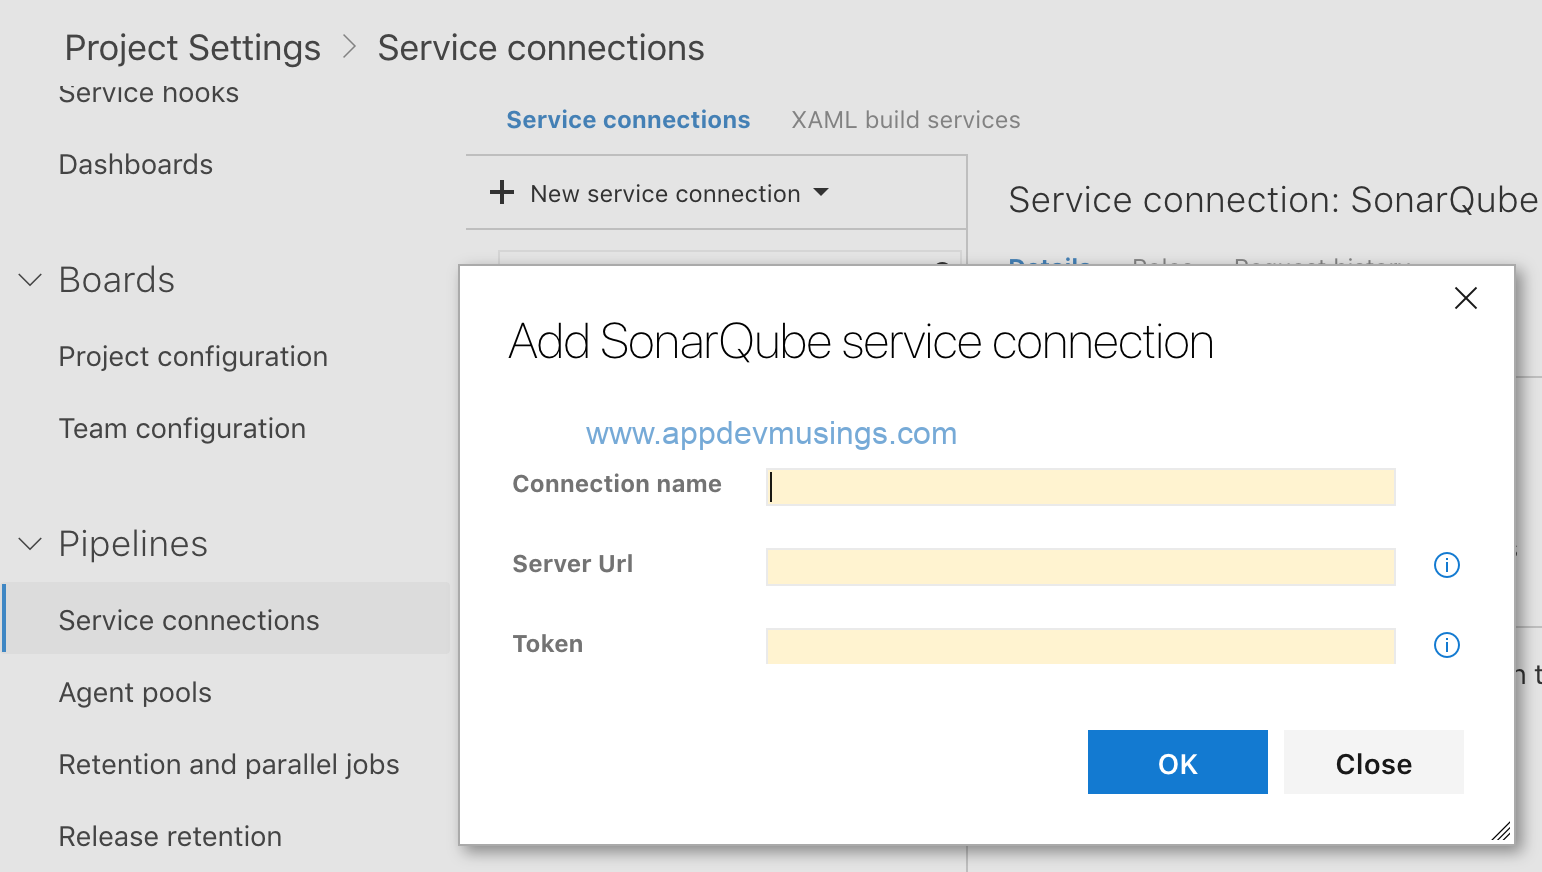
Create a new Service Connection in Azure DevOps
In order to connect Azure DevOps to SonarQube, you will need to create a new service connection in Azure DevOps. The main pointers are
- Specify a connection name
- Specify the Server Url as endpoint address of SonarQube
- Specify Token value which is generated in previous step
Setting up Azure DevOps build pipeline for Angular App
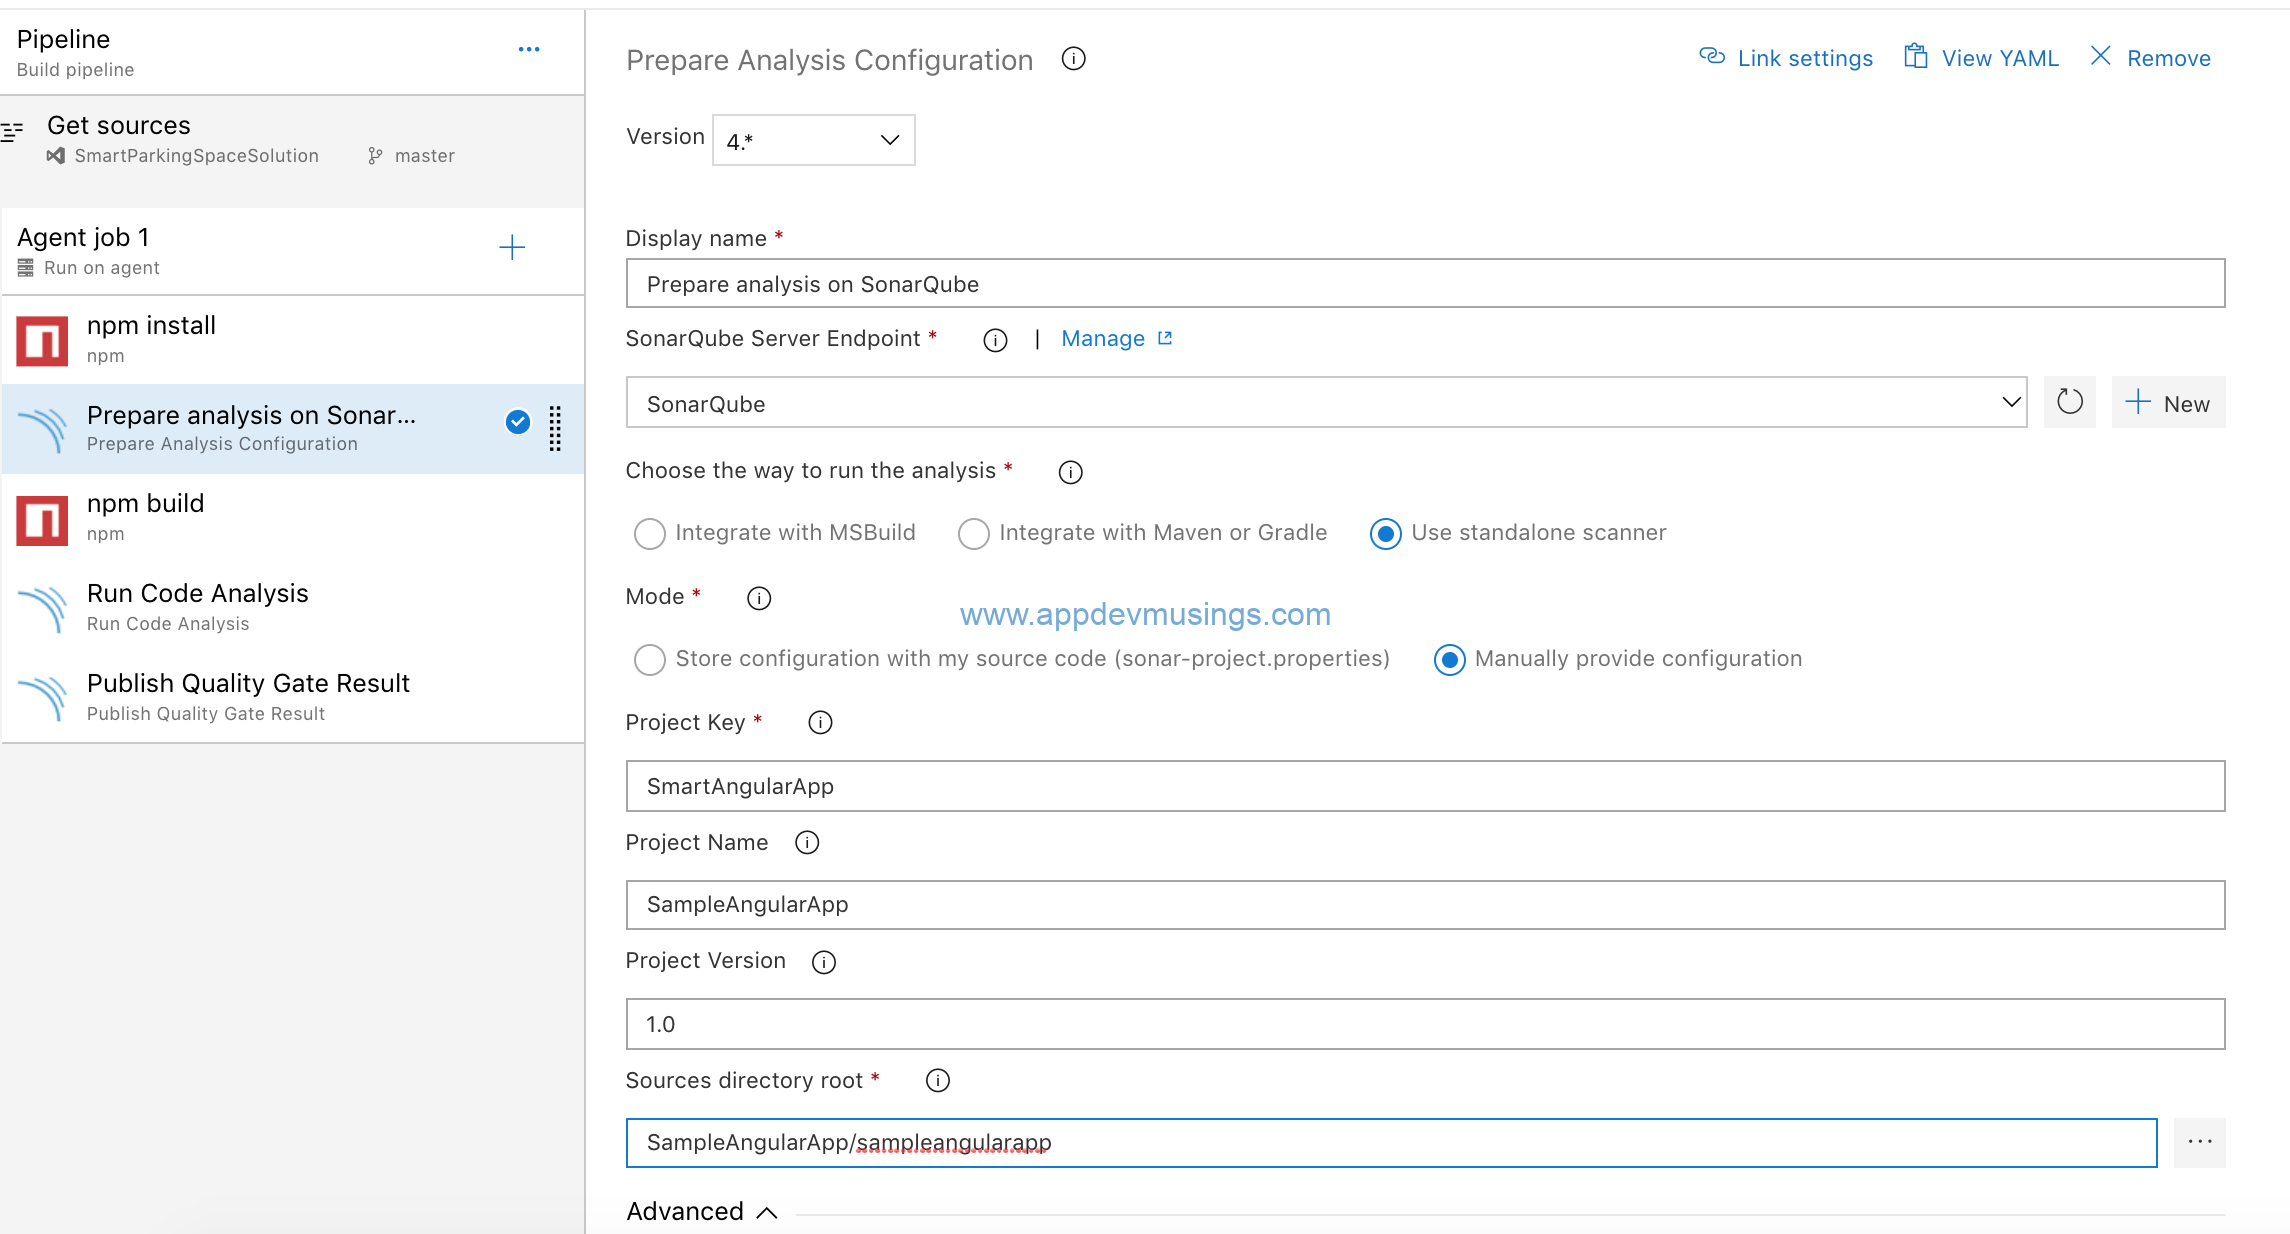
The three steps needed for SonarQube integration barring npm install and npm build are
- Prepare Analysis Configuration
- This step needs to be run before build
- Select SonarQube server endpoint
- Specify Project Key and Project Name for Angular App
- Specify Sources directory root i.e. path to root directory containing source files
- Run Code Analysis
- This step needs to be run after build
- Publish Quality Gate Result
Setting up Azure DevOps build pipeline for ASP.NET Core Web API App
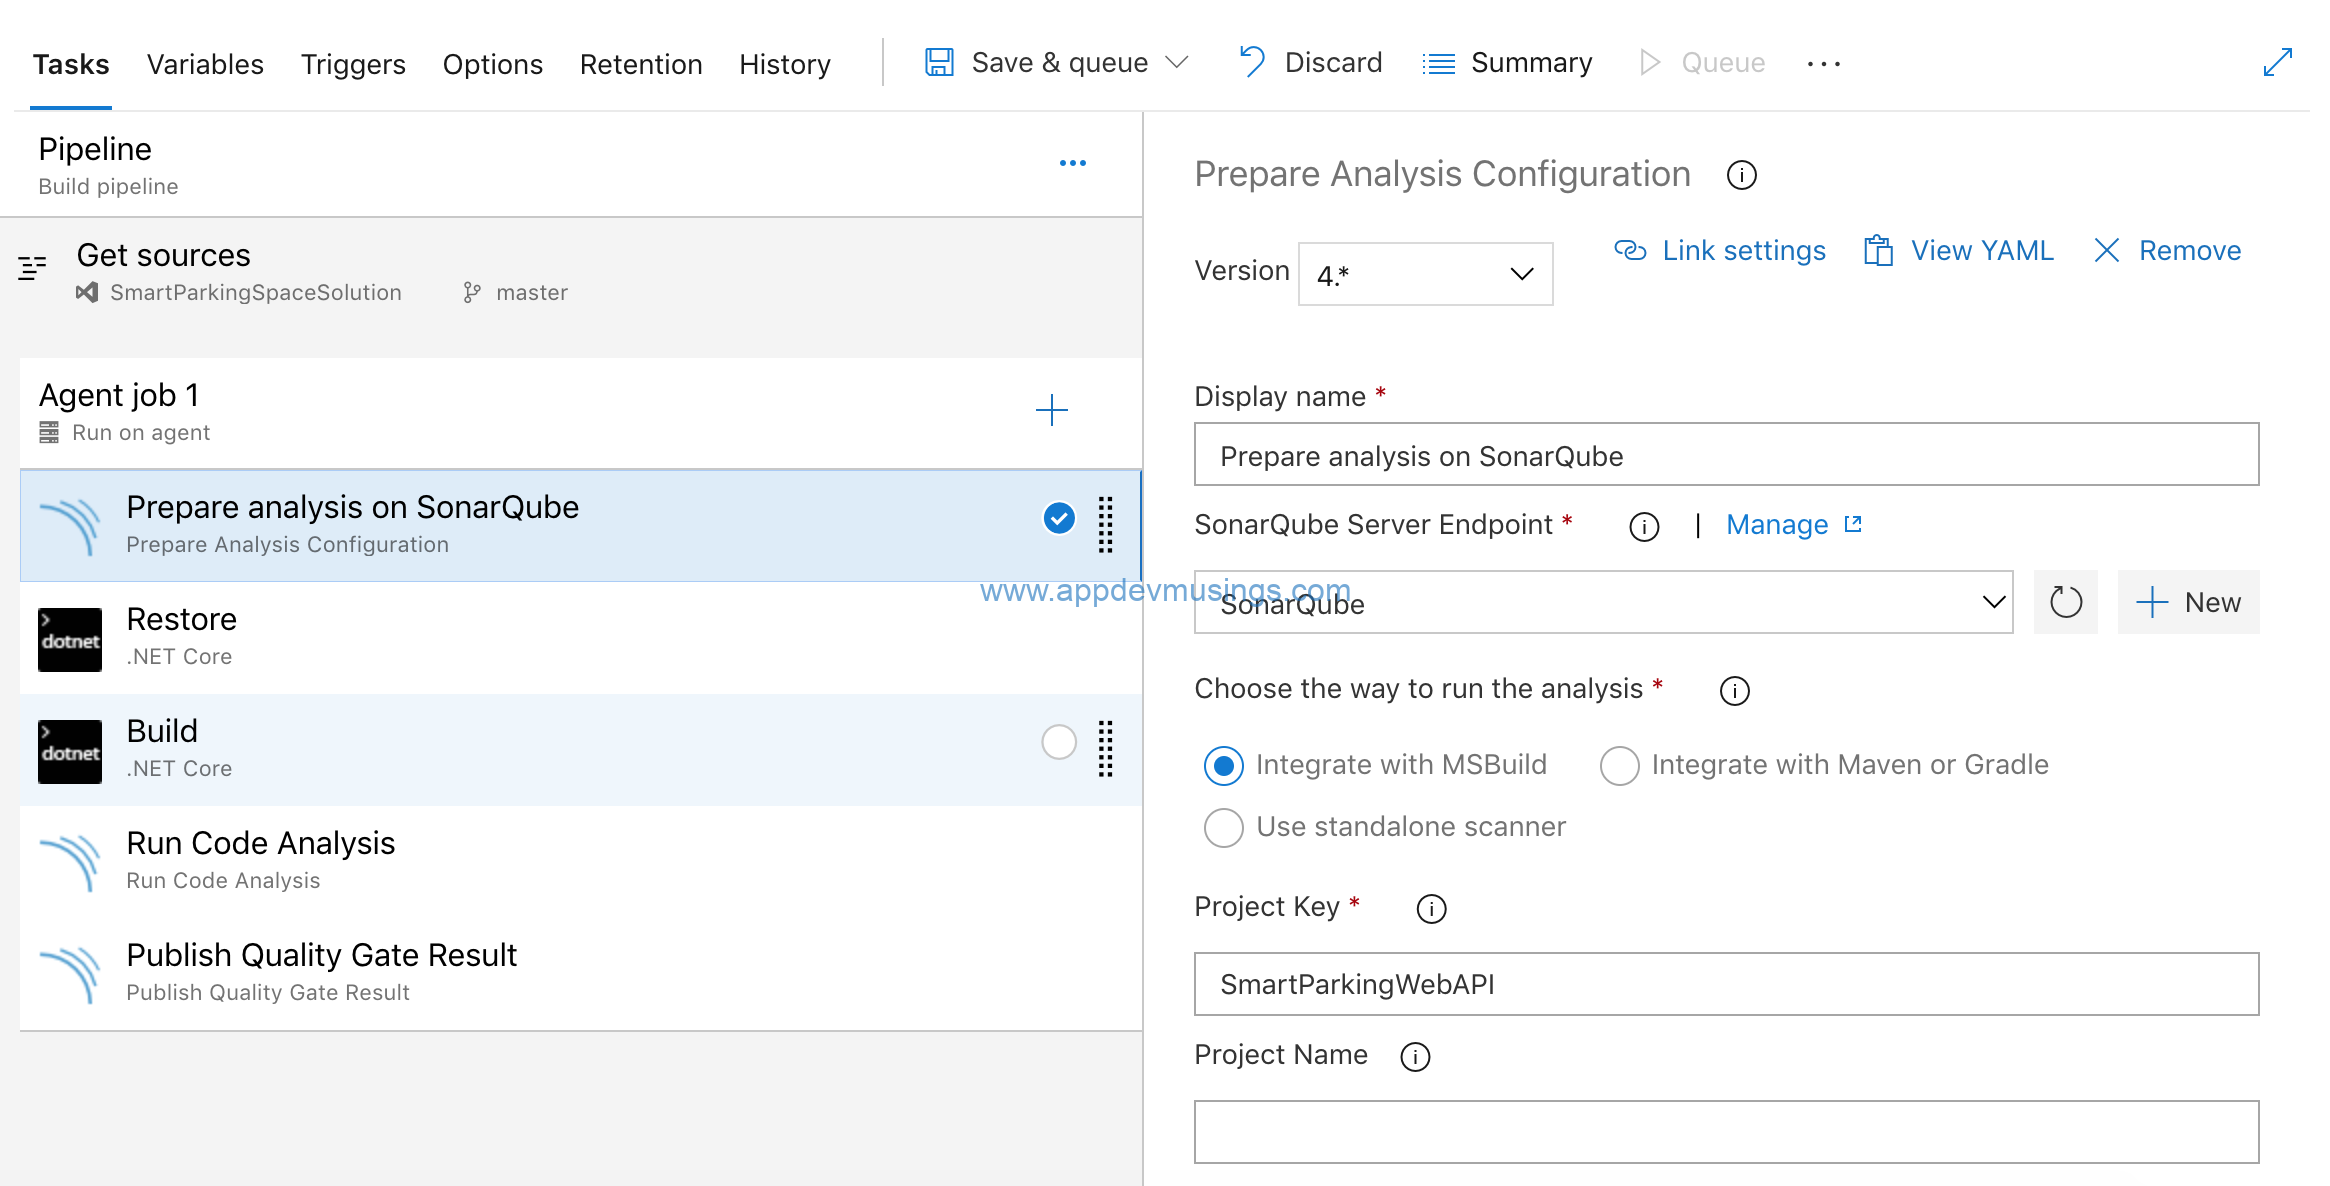
The three steps needed for SonarQube integration barring Restore and Build are
- Prepare Analysis Configuration
- This step needs to be run before build
- Select SonarQube server endpoint
- Specify Project Key for ASP.NET Core Web API App
- Select integrate with MSBuild option
- Run Code Analysis
- This step needs to be run after build
- Publish Quality Gate Result
Queue Angular and ASP.NET Core Web API Builds
Queue Angular and ASP.NET Core Web API builds on you can see detailed analysis in SonarQube portal.

This completes this article on deploying SonarQube to Azure Kubernetes Service cluster and integration with Azure DevOps build pipeline. The Kubernetes resources needed to deploy SonarQube to AKS cluster can be downloaded from GitHub.