Kubernetes has production level support for Windows nodes and Windows containers starting v1.14. The preview of Windows Server containers in Azure Kubernetes Service was announced recently and in this article I am going to share steps needed to run Windows containers in AKS.
- Create a ASP.NET Core 3.0 (preview) application
- Build and Publish Docker Image (Windows Server 2019)
- Deploy ASP.NET Core 3.0 application to Windows nodes in Azure Kubernetes Service cluster
The dev tools used to develop these components are Visual Studio 2019/VS Code/Visual Studio for Mac, Docker for Windows (Docker CE) & Kubectl. AKS Dashboard as well as kubectl commands are used to create Kubernetes resources in AKS. The source code is available for download at GitHub.
Create Azure Kubernetes Service Cluster
Support for Windows containers is in preview and you need to follow the steps listed in AKS documentation to enable this feature. Key pointers are
- WindowsPreview feature flag needs to be enabled for subscription
- This feature can’t be enabled for existing clusters
- Cluster needs to use a network policy that uses Azure CNI network advanced networking
- VMSS (Virtual machine scale sets) needs to be enabled for the cluster
- Node pool that can support Windows containers needs to be created since default node pool only supports Linux containers
- Windows Server containers should be based on Windows Server 2019 or greater
nodeSelectorconstraint needs to be specified in deployment resource to enable the Pod to get scheduled on Windows Server nodes
You can execute commands listed below to view details about Nodes
- Run this command to list all nodes
kubectl get nodes - Run this command to get details of node
kubectl describe nodes {NAME}
Create ASP.NET Core 3.0 (preview) application
In order to create an ASP.NET Core 3.0 application which will be deployed as a Windows container image to Azure Kubernetes Service you need to ensure that .NET Core 3.0 SDK and runtime/hosting bundle are installed. You can install these from download .NET Core 3.0.
Once these dependencies are installed, create an ASP.NET Core 3.0 web application. I have modified the default controller to return executing process name. ASP.NET Core 3.0 app will be using in-process hosting model. You can go through one of my previous articles for further details about in-process and out-of-process hosting models.
Update the DockerFile as displayed below and main pointers about DockerFile are
- Base image is Windows Server 2019 with IIS i.e.
mcr.microsoft.com/windows/servercore/iis:windowsservercore-ltsc2019 - .NET Core 3.0 hosting runtime needs to be installed
mcr.microsoft.com/dotnet/core/sdk:3.0image is needed to build .NET Core 3.0 application.- ASP.NET Core 3.0 Web application is hosted in IIS
- Docker multi-stage build optimizes image size by removing intermediate containers.
- Instead of using Default Web Site, I have created a new app pool and a web site. App pool name is ‘ap-samplewebapp’ and web site name is ‘samplewebapp’.
- Managed Runtime version of app pool is set to blank since ASP.NET Core runs in a separate process and manages the runtime. ASP.NET Core doesn’t rely on loading the desktop CLR. Setting the .NET CLR version to No Managed Code is optional.
 # escape=`

FROM mcr.microsoft.com/windows/servercore/iis:windowsservercore-ltsc2019 as base

## Install dotnet 3.0.0-preview5 hosting pack

SHELL["powershell", "-Command", "$ErrorActionPreference = 'Stop'; $ProgressPreference = 'Continue'; $verbosePreference='Continue';"]

ADD https://download.visualstudio.microsoft.com/download/pr/41483896-e029-40ff-b167-b4dde24153e1/ccd755c56bc8cfeb38ef816e54deb906/dotnet-hosting-3.0.0-preview5-19227-01-win.exe "C:/setup/dotnet-hosting-3.0.0-preview5-19227-01-win.exe"

RUN start-process -Filepath "C:/setup/dotnet-hosting-3.0.0-preview5-19227-01-win.exe" -ArgumentList @('/install', '/quiet', '/norestart') -Wait

RUN Remove-Item -Force "C:/setup/dotnet-hosting-3.0.0-preview5-19227-01-win.exe"

FROM mcr.microsoft.com/dotnet/core/sdk:3.0 AS build

WORKDIR /src

COPY ["SampleWebApp/SampleWebApp.csproj", "SampleWebApp/"]

RUN dotnet restore "SampleWebApp/SampleWebApp.csproj"

COPY. .

WORKDIR "/src/SampleWebApp"

RUN dotnet build "SampleWebApp.csproj" -c Release -o /app

FROM build AS publish

RUN dotnet publish "SampleWebApp.csproj" -c Release -o /app

FROM base AS final

WORKDIR /inetpub/wwwroot/SampleWebApp

RUN Remove-Website -Name 'Default Web Site';

RUN Import-Module WebAdministration; `

    New-WebAppPool -Name 'ap-SampleWebApp'; `

    Set-ItemProperty IIS:\AppPools\ap-SampleWebApp -Name managedRuntimeVersion -Value ''; `

    Set-ItemProperty IIS:\AppPools\ap-SampleWebApp -Name enable32BitAppOnWin64 -Value 0; `

    Set-ItemProperty -Path IIS:\AppPools\ap-SampleWebApp -Name processModel -value @{identitytype='LocalSystem'}

RUN New-Website -Name 'SampleWebApp' `

                -Port 80 -PhysicalPath 'C:\inetpub\wwwroot\SampleWebApp' `

                -ApplicationPool 'ap-SampleWebApp' -force

COPY --from=publish /app.

EXPOSE 80
Build and Publish Docker Image to Docker Hub
If you have Docker for Windows installed, you can run commands listed below to build and publish docker image to Docker Hub
- Build and Tag Docker Image:
docker build -t {YOUR_DOCKER_REPO} -f ./SampleWebApp/DockerFile . - Publish Image to Docker Hub:
docker push {YOUR_DOCKER_REPO}
Create a Kubernetes Deployment
Create a Kubernetes deployment resource and main pointers are
nodeSelectoris the simplest form of node selection constraint. PodSpec’snodeSelectorfield is"beta.kubernetes.io/os": windowsand this constraint will ensure that Pod is scheduled on a Windows Server node.- Update deployment resource image field value to your docker image repository
 apiVersion: apps/v1beta1

kind: Deployment

metadata:

  name: samplewebapp

  namespace: default

  labels:

    app: samplewebapp

spec:

  replicas: 1

  selector:

    matchLabels:

        app: samplewebapp

  template:

    metadata:

      name: samplewebapp

      labels:

        app: samplewebapp

    spec:

      nodeSelector:

        "beta.kubernetes.io/os": windows

      containers:

      - name: samplewebapp

        image: YOUR_DOCKER_IMAGE

        resources: {}

        terminationMessagePath: "/dev/termination-log"

        terminationMessagePolicy: File

        imagePullPolicy: Always

        securityContext:

          privileged: false

      restartPolicy: Always

      terminationGracePeriodSeconds: 30

      dnsPolicy: ClusterFirst

      securityContext: {}

      schedulerName: default-scheduler
Create a Kubernetes Service
Create a Kubernetes service resource for the samplewebapp deployment.
 apiVersion: v1

kind: Service

metadata:

  name: samplewebapp

  labels:

    app: samplewebapp

spec:

  type: LoadBalancer

  ports:

  - protocol: TCP

    port: 80

  selector:

    app: samplewebapp
Summary
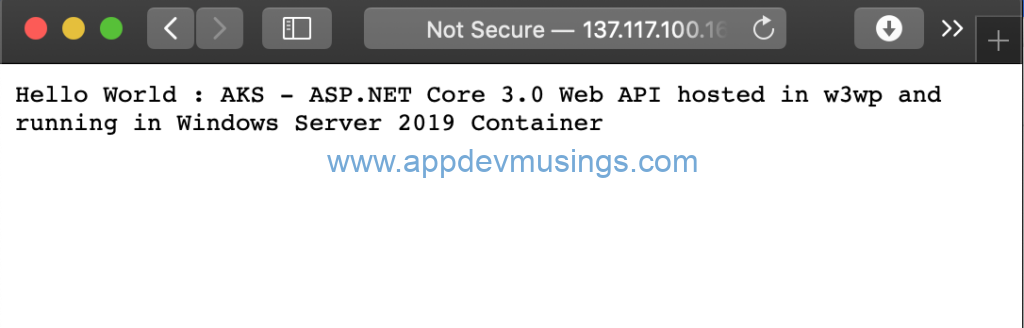
Browse to the external endpoint (service) and you can view that ASP.NET Core 3.0 Web App is running within IIS in Azure Kubernetes Service cluster Windows nodes.