Health checks API is one of the new features of ASP.NET Core 2.2 for application health monitoring. Health checks are exposed by ASP.NET Core 2.2 application as HTTP endpoints which enables liveness and readiness probes.
Health checks are usually used with an external monitoring service or container orchestrator to check the status of an app. In this article, I am going to share steps needed to configure Kubernetes Liveness and Readiness probes for an ASP.NET Core 2.2 web application deployed in Azure Kubernetes Service cluster.
The dev tools used to develop these components are Visual Studio for Mac/Visual Studio 2017 and Visual Studio Code. AKS Dashboard as well as kubectl commands are used to create Kubernetes resources in AKS. The complete source code for this application can be downloaded from GitHub
Kubernetes Liveness and Readiness probes
The kubelet is the primary “node agent” that runs on each node. The kubelet uses liveness probes to know when to restart a Container. Some of the scenarios which will need auto-restarting a container to ensure that application is available even though there may be underlying issues are
- Application is unresponsive (e.g. in deadlock scenario)
- Fatal exceptions
- Hung Pods
As an example, let’s say that 3 Pods are created for a component and all Pods are accepting traffic (in Ready state). Kubelet restarts ‘POD 2’ as liveness probes fail for ‘POD 2’ and new Pod i.e. ‘POD 4’ is created. The kubelet uses readiness probes to know when a Container is ready to start accepting traffic. When a Pod is not ready, it is removed from Service load balancers. Some of the scenarios where traffic shouldn’t be routed to the POD unless POD is ready are
- Initial startup e.g. building caches on startup
- Core dependencies which should always be available for the Container e.g. Database, Endpoints etc.
As an example, let’s say that 3 Pods are created for a component. Once readiness probes succeeds for a Pod, then only Service sends network traffic to the specific Pod. Kinds of Liveness and Readiness probes are
- Executing a Command inside container: Kubelet executes the command in a container
- HTTP Get Request: Kubelet send HTTP Get request to the server running in a container
- TCP Liveness probe: Kubelet will try to open a socket to your container on the specified port
‘HTTP Get request’ probes will be used to configure health checks for ASP.NET Core 2.2 application. You can read further about Kubernetes Liveness and Readiness probes.
Define a Liveliness HTTP request
Liveness probes can be defined by adding livenessProbe to PodSpec as displayed below and main pointers are
- HTTP Get request endpoint for liveness probe is
/health/liveand port is 80. initialDelaySeconds: 3field tells the kubelet that it should wait 3 seconds before performing the first probe. This setting should be specified based on time needed to initialize the Container.periodSeconds: 3field specifies that the kubelet should perform a liveness probe every 3 seconds.- If the endpoint returns failure code, Kubelet kills the Container and restarts it.
timeoutSeconds: 2is 2 seconds. Default value is 1 second. If the liveness probe timeout is too short, Container will be restarted thus this value should be set appropriately based on the designed liveness probe.failureThreshold: 4specified the number of times Kubernetes will try before giving up when the probe fails. Default value is 3 and minimum value is 1. Giving up in case of liveness probe means restarting the Pod.successThreshold: 1specifies minimum consecutive successes for the probe to be considered successful after having failed. This value must be 1 for liveness probe.
         livenessProbe:

          httpGet:

            path: /health/live

            port: 80

          initialDelaySeconds: 3

          periodSeconds: 3

          timeoutSeconds: 2

          failureThreshold: 4

          successThreshold: 1
Define a Readiness HTTP request
Readiness probes can be defined by adding readinessProbe to PodSpec as displayed below and main pointers are
- HTTP Get request endpoint for readiness probe is
/health/readyand port is 80. initialDelaySeconds: 5field tells the kubelet that it should wait 5 seconds before performing the first probe.periodSeconds: 5field specifies that the kubelet should perform a readiness probe every 5 seconds.- Readiness probe runs on the container during whole lifecycle, thus you need to be careful while designing readiness probes.
timeoutSeconds: 2is 2 seconds. Default value is 1 second.failureThreshold: 4specified the number of times Kubernetes will try before giving up when the probe fails. Default value is 3 and minimum value is 1. In case of readiness probe the Pod will be marked Unready.successThreshold: 2specifies minimum consecutive successes for the probe to be considered successful after having failed. Default value is 1 and minimum value is 1.
         readinessProbe:

          httpGet:

            path: /health/ready

            port: 80

          initialDelaySeconds: 5

          periodSeconds: 5

          timeoutSeconds: 2

          failureThreshold: 4

          successThreshold: 2
Readiness and liveness probes can be used in parallel for the same container. Using both can ensure that traffic does not reach a container that is not ready for it, and that containers are restarted when they fail.
Health Checks in ASP.NET Core 2.2 application
ASP.NET Core offers Health Check Middleware and libraries for reporting the health of app infrastructure components. Health checks are exposed by an app as HTTP endpoints.
Create health checks
Health checks are created by implementing the IHealthCheck interface. The IHealthCheck.CheckHealthAsync method returns a Task<HealthCheckResult> that indicates the health as Healthy, Degraded, or Unhealthy.
In the subsequent section I am going to create pair of health checks to distinguish two app states
- Readiness: The app is functioning but not yet ready to receive requests.
- Liveness: The app is functioning and responding to requests.
Sample Liveness and Readiness probe health checks
I have created liveness and readiness probe checks as displayed below and complete code for ASP.NET Core 2.2 application project is located at GitHub.
     internal class LivenessHealthCheck : IHealthCheck

    {

        public LivenessHealthCheck()

        {

        }

        public Task<HealthCheckResult> CheckHealthAsync(HealthCheckContext context, CancellationToken cancellationToken = default(CancellationToken))

        {

            // Some Liveness check

            Console.WriteLine("LivenessHealthCheck executed.");

            return Task.FromResult(HealthCheckResult.Healthy());

        }

    }
{
public LivenessHealthCheck()
{
}
public Task<HealthCheckResult> CheckHealthAsync(HealthCheckContext context, CancellationToken cancellationToken = default(CancellationToken))
{
// Some Liveness check
Console.WriteLine("LivenessHealthCheck executed.");
return Task.FromResult(HealthCheckResult.Healthy());
}
}
internal class ReadinessHealthCheck : IHealthCheck

    {

        public ReadinessHealthCheck()

        {

        }

        public bool StartupTaskCompleted { get; set; } = false;

        public Task<HealthCheckResult> CheckHealthAsync(HealthCheckContext context, CancellationToken cancellationToken = default(CancellationToken))

        {

            // Some Readiness check

            Console.WriteLine("Readiness health check executed.");

            if (StartupTaskCompleted)

            {

                return Task.FromResult(

                    HealthCheckResult.Healthy("The startup task is finished."));

            }

            return Task.FromResult(

                HealthCheckResult.Unhealthy("The startup task is still running."));

        }

    }
internal class ReadinessHealthCheck : IHealthCheck
{
public ReadinessHealthCheck()
{
}
public bool StartupTaskCompleted { get; set; } = false;
public Task<HealthCheckResult> CheckHealthAsync(HealthCheckContext context, CancellationToken cancellationToken = default(CancellationToken))
{
// Some Readiness check
Console.WriteLine("Readiness health check executed.");
if (StartupTaskCompleted)
{
return Task.FromResult(
HealthCheckResult.Healthy("The startup task is finished."));
}
return Task.FromResult(
HealthCheckResult.Unhealthy("The startup task is still running."));
}
}
Update ConfigureServices method to add health checks as displayed below
        public void ConfigureServices(IServiceCollection services)

        {

            services.AddMvc().SetCompatibilityVersion(CompatibilityVersion.Version_2_2);

            services.AddHostedService<StartupHostedService>();

            services.AddSingleton<ReadinessHealthCheck>();

            services.AddSingleton<LivenessHealthCheck>();


            services.AddHealthChecks()

            .AddLivenessHealthCheck("Liveness", HealthStatus.Unhealthy, new List<string>(){"Liveness"})

            .AddReadinessHealthCheck("Readiness", HealthStatus.Unhealthy, new List<string>{ "Readiness" });

        }
Update Configure method of startup class to user Health checks as displayed below
        app.UseHealthChecks("/health/live", new HealthCheckOptions()

            {

                Predicate = check => check.Name == "Liveness"

            })

            .UseHealthChecks("/health/ready", new HealthCheckOptions()

            {

                Predicate = check => check.Name == "Readiness",

            });
Build Docker Image
Run command docker build -t {YOUR_IMAGE_REGISTRY} . to build docker image and run command docker push {YOUR_IMAGE_REGISTRY} to publish image to Docker hub.
Create Kubernetes Deployment
The next step is to create a Kubernetes deployment for ASP.NET Core 2.2 application where Readiness and Liveness probes are specified as discussed in previous section. You can download this file from GitHub.
 apiVersion: apps/v1

kind: Deployment

metadata:

  name: samplewebapp

  namespace: default

  labels:

    app: samplewebapp

spec:

  replicas: 1

  selector:

    matchLabels:

        app: samplewebapp

  template:

    metadata:

      name: samplewebapp

      labels:

        app: samplewebapp

    spec:

      containers:

      - name: samplewebapp

        image: YOUR_DOCKER_IMAGE

        readinessProbe:

          httpGet:

            path: /health/ready

            port: 80

          initialDelaySeconds: 5

          periodSeconds: 5

          failureThreshold: 3

          successThreshold: 2

        livenessProbe:

          httpGet:

            path: /health/live

            port: 80

          initialDelaySeconds: 30

          periodSeconds: 30

          failureThreshold: 3

          successThreshold: 1

        resources:

          limits:

            cpu: 500m

            memory: 0.5Gi

          requests:

            cpu: 100m

            memory: 0.5Gi

        terminationMessagePath: "/dev/termination-log"

        terminationMessagePolicy: File

        imagePullPolicy: Always

        securityContext:

          privileged: false

      restartPolicy: Always

      terminationGracePeriodSeconds: 30

      dnsPolicy: ClusterFirst

      securityContext: {}

      schedulerName: default-scheduler
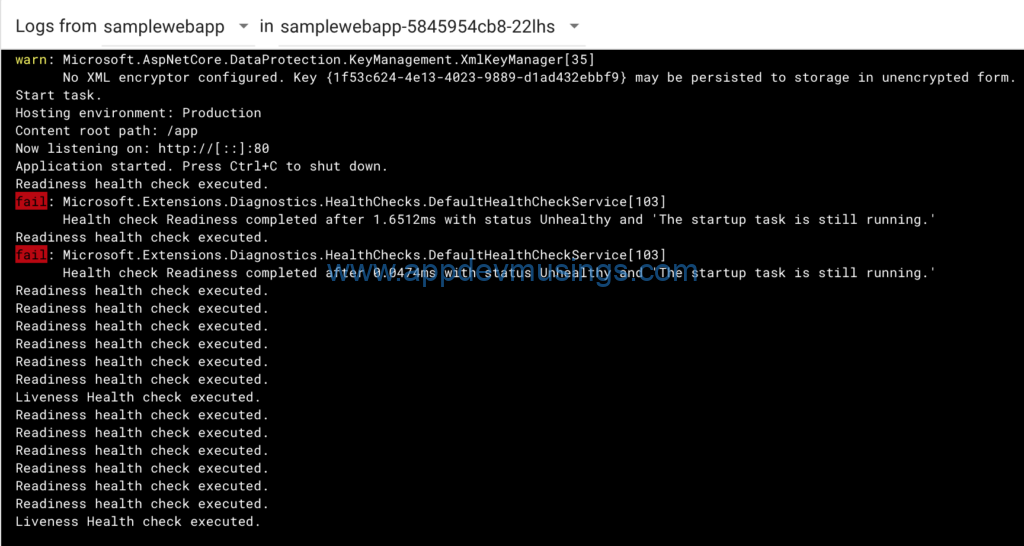
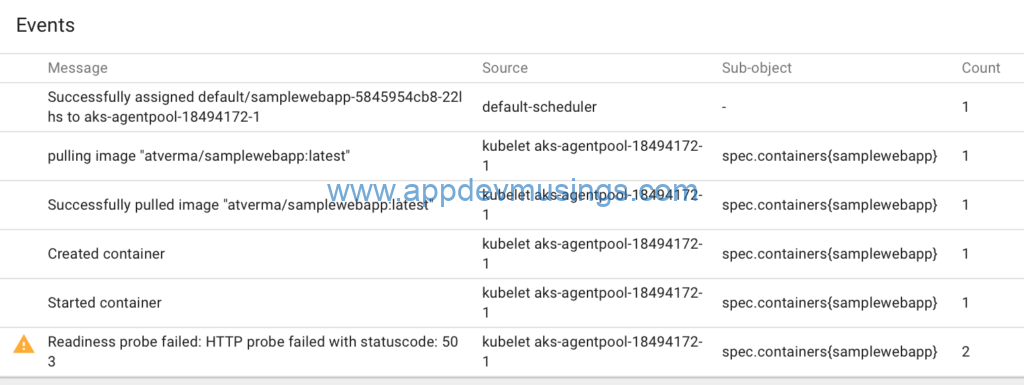
Initially Readiness probes fail because of long running startup task however once startup task is complete, Pod is ready. You can view that Liveness and Readiness probe checks are getting logged for the Container.
Summary
This article covered configuring Kubernetes Liveness and Readiness probes using Health Checks feature introduced in ASP.NET Core 2.2. The complete source code for this application can be downloaded from GitHub